Morning @jero,
Unfortunately, I don’t have any data to test with from a webhook handy. So I am just using the webhook /test URL, and I have appending a query to the end (which is todays date (whoops - I just realised I put 2024 ![]() - living in the past, haha)) for my test data. this is what the URL looks like in full:
- living in the past, haha)) for my test data. this is what the URL looks like in full:
https://cloud.activepieces.com/api/v1/webhooks/WEBHOOK_ID/test?date=18/03/2024
This allows me to be able to use the test data from this made up query to mimic as if it was data being sent from an actual webhook.
Note: I replaced my actual webhook ID with the text WEBHOOK_ID so you would need to update this to your ID if you wanted to use it. But since you are working with a live webhook, there shouldn’t be any need for you to use this.

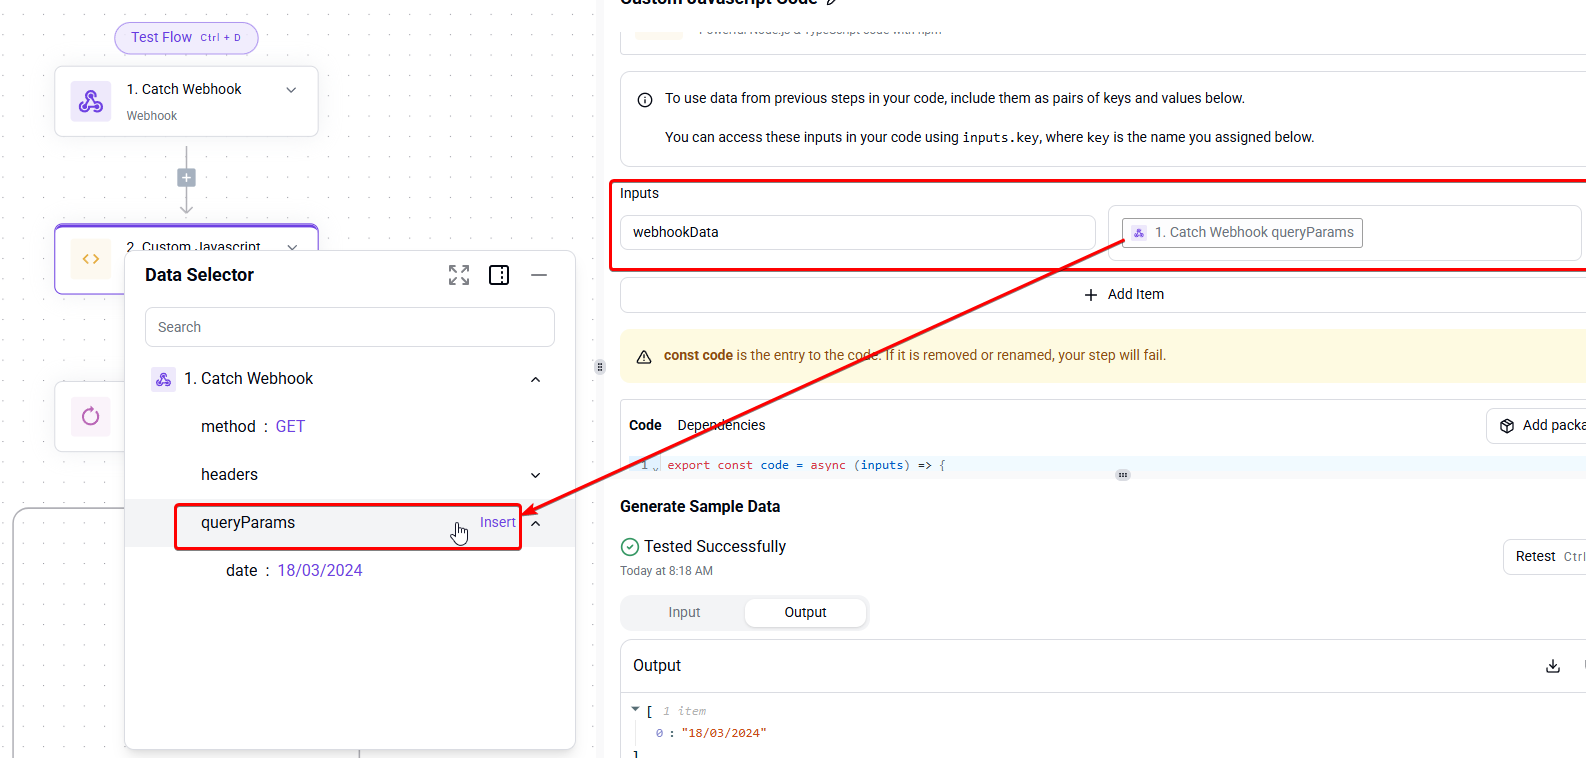
Next, you can use a custom code piece to trick ActivePieces into returning the data as a list, (even if it only has a single item). You will need to make sure to fill in the Inputs with the data you want to pass.
In my example below, you can see I pass the query from my made up webhook test data:
And, then you can use something like this in the code piece to achieve your desired result.
In this example, we take the input data, make sure even if it is a single result, that we always return it in an array format (which will meet the ‘list’ requirement needed for the loop piece).
I have added comments to explain what each part of the code does:
export const code = async (inputs) => {
  // This will store the data you have passed from your webhook from the "Inputs" above.
  let data = inputs.webhookData;
  // Now we need to make sure it's always treated as list for the loop [technically, an array].
  if (!Array.isArray(data)) {
    data = [data];
  }
  // Then we will extract the 'date' field as a plain text string (for storing in our table, storage piece, or whatever).
  const formattedData = data.map(item => item.date);
  // Finally, we return our formatted data.
  return formattedData;
};
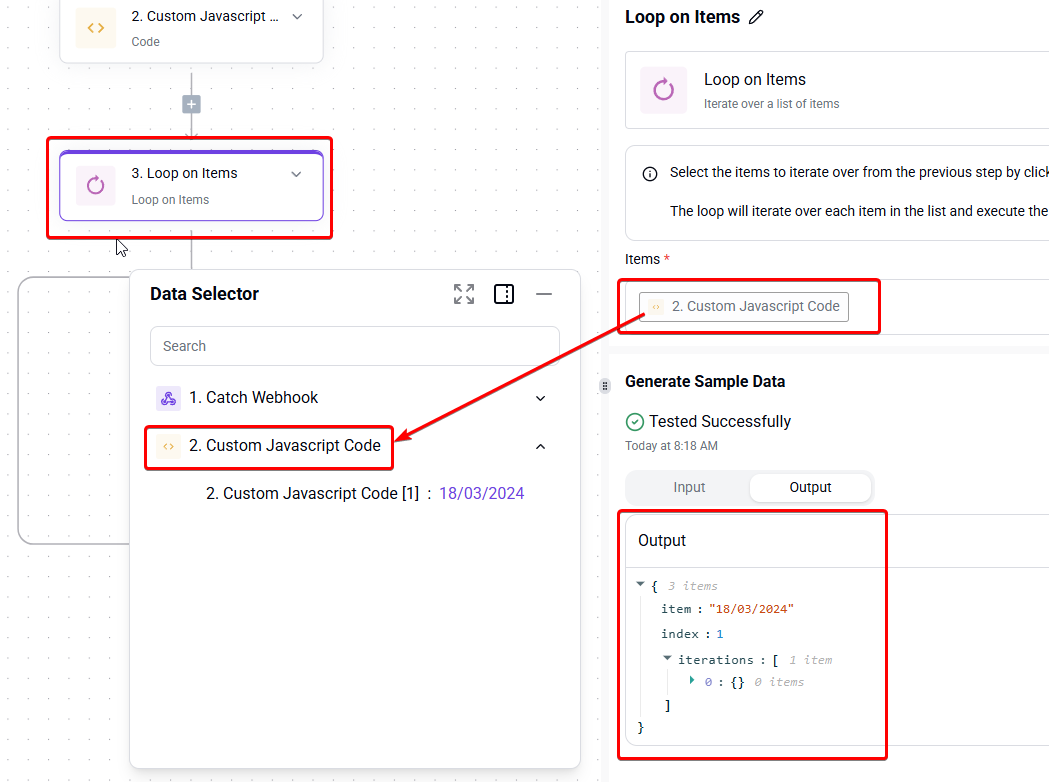
If all went well, we should now see something like the following:

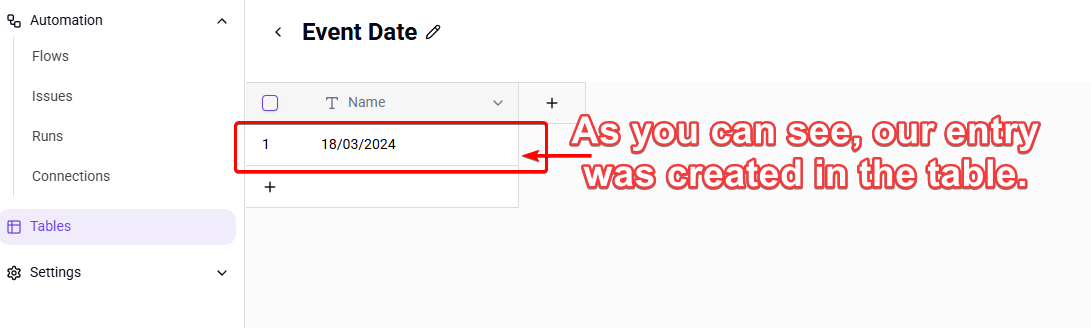
Now, we can utilise the result in our LOOP piece. In this simple example, I just use a Table piece and use the Create a new entry inside of the table.
As can be seen below:

Here is a link to the demo flow from the screenshots above. It isn’t fully what you wanted with the Router piece incorporated. Unfortunately, I am out of time and need to head to work.
But this should help you to fill in the missing parts of your flow in the original post, and help you to find a working solution.
Hope this helps. ![]()
EDIT:
Forgot to mention, don’t forget you will need to create the Table “Event Date” to use in the table piece.
Also, if you just wanted a very simple example of the loop piece in action, I did create another demo, which I wasn’t going to share, but hey, it might help others, so why not. (Just note, that to use you will need to create a table named “Colours”):